Installing a mini split system can be one of the best decisions you make for your home, especially as winter approaches. This guide will walk you through everything you need to know about heat pumps, mini split systems, and HVAC installation in Denver, Colorado.
The Practical Guide to Installing a Mini Split System Before Winter Hits
When the temperatures start to drop in Denver, having an efficient heating system is essential. A mini split system not only keeps your indoor space cozy but also saves energy, making it a smart choice for homeowners. So let’s dive into the practicalities of installing this modern heating solution.
Understanding Mini Split Systems
What Is a Mini Split System?
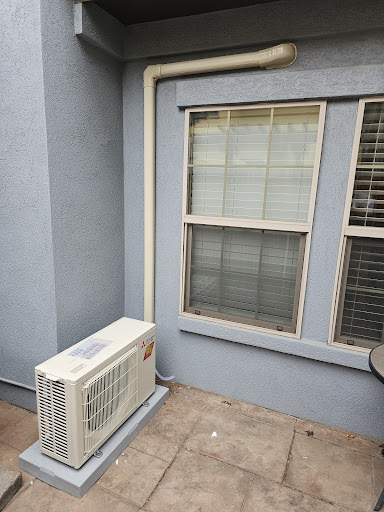
A mini split system is a type of ductless HVAC solution that provides both heating and cooling. Unlike traditional systems that rely on ducts to distribute air, mini splits consist of an outdoor unit and one or more indoor units connected by refrigerant lines.
How Do Mini Splits Work?
Mini splits operate using heat pump technology. In heating mode, they extract heat from the outside air (even in cold weather) and transfer it indoors. Conversely, during warmer months, they can reverse this process to provide cooling.
Benefits of Heat Pumps for Heating Your Home
Energy Efficiency
Heat pumps are known for their high energy efficiency. According to the U.S. Department of Energy, modern mini split systems can achieve efficiencies exceeding 20 SEER (Seasonal Energy Efficiency Ratio). This translates to lower utility bills!
Versatility
One of the standout features of mini splits is their versatility; they can be used for individual rooms or entire homes depending on your needs. Whether you’re looking to heat a small bedroom or your entire basement, there’s a solution available.
Choosing the Right Mini Split System for Your Home
Sizing Your Mini Split System
Proper sizing is crucial when it comes to heat pump installation. An undersized unit won't effectively heat your space, while an oversized unit can lead to unnecessary energy consumption and short cycling.
To determine the correct size:
- Calculate the square footage of each room. Consider insulation quality. Evaluate window placements and sizes.
Selecting Indoor Units
You have options when it comes to indoor units—wall-mounted types are common but ceiling cassettes or floor-mounted units might suit your aesthetic better. Choose what works best for your space!
Heat Pump Installation: Step-by-Step Process
1. Gather Necessary Tools and Materials
Before starting with the installation process, ensure you have all necessary tools on hand:
- Drill Wrench set Level Measuring tape Screwdrivers
2. Choose an Installation Location
The outdoor unit should be installed in an area with good airflow and away from obstructions like fences or trees. Indoors, place the units where airflow is unobstructed—consider height and visibility.
Preparing for Installation
3. Set Up Electrical Connections
Consult local codes regarding electrical connections as improper wiring can cause issues later on! It’s often recommended to hire a licensed electrician if you're unsure about this stage.
4. Install Mounting Bracket for Indoor Unit
Using a level, mark the wall where you'll install the mounting bracket for the indoor unit. Make sure it's at least three inches away from ceilings or other obstacles.
Connecting Indoor and Outdoor Units
5. Run Refrigerant Lines
Carefully drill holes through walls to run refrigerant lines between outdoor and indoor units without damaging any existing electrical wiring or plumbing.
6. Connect Electrical Wiring Between Units
Ensure that all connections are tight and secure! This step often requires assistance; enlisting help will make it easier.
Finalizing Installation Steps
7. Secure Outdoor Unit on a Stable Base
Place concrete blocks or purchase an outdoor pad designed specifically for these units; stability is key!
8. Perform Leak Test on Refrigerant Lines
After connecting everything, check thoroughly for any leaks before proceeding with further steps—no one wants refrigerant escaping into thin air!
Testing Your New Mini Split System
9. Power On Your System & Test Functionality
Once everything’s connected properly—turn it on! Ensure that both heating and cooling functions work seamlessly; testing now can save headaches later on.
Common Mistakes During Heat Pump Installation
1. Choosing Incorrect Size
As mentioned earlier—aiming too big or too small could lead down frustrating paths!
2. Neglecting Local Codes
Always check local regulations before installation; compliance matters!
FAQs About Mini Split Systems
Q1: Can I install a mini split system myself?
A1: While DIY might seem tempting, hiring professionals ensures efficiency and safety during installation.
Q2: How much does it cost to install a mini split system?
A2: Costs vary based on several factors including size and complexity; expect anywhere from $3,000-$10,000 depending on your specific needs.
Q3: Are mini splits energy-efficient?
A3: Absolutely! They typically consume less energy than traditional systems due to their innovative technology.
Q4: Can I use my mini split system year-round?
A4: Yes! They provide both heating in winter months and cooling during summer months—a versatile choice indeed!
Q5: What maintenance do these systems require?
A5: Regularly clean filters every month during peak usage periods and schedule professional maintenance annually.
Q6: Do I need permits before installation?
A6: Depending on local codes in Denver, heat pump installation services in Denver some installations may require permits; always check first!
This guide offers comprehensive insight into installing a mini split system before winter hits! With careful planning and execution following these steps will not only keep warm but will also enhance overall comfort at home throughout harsh seasons ahead!